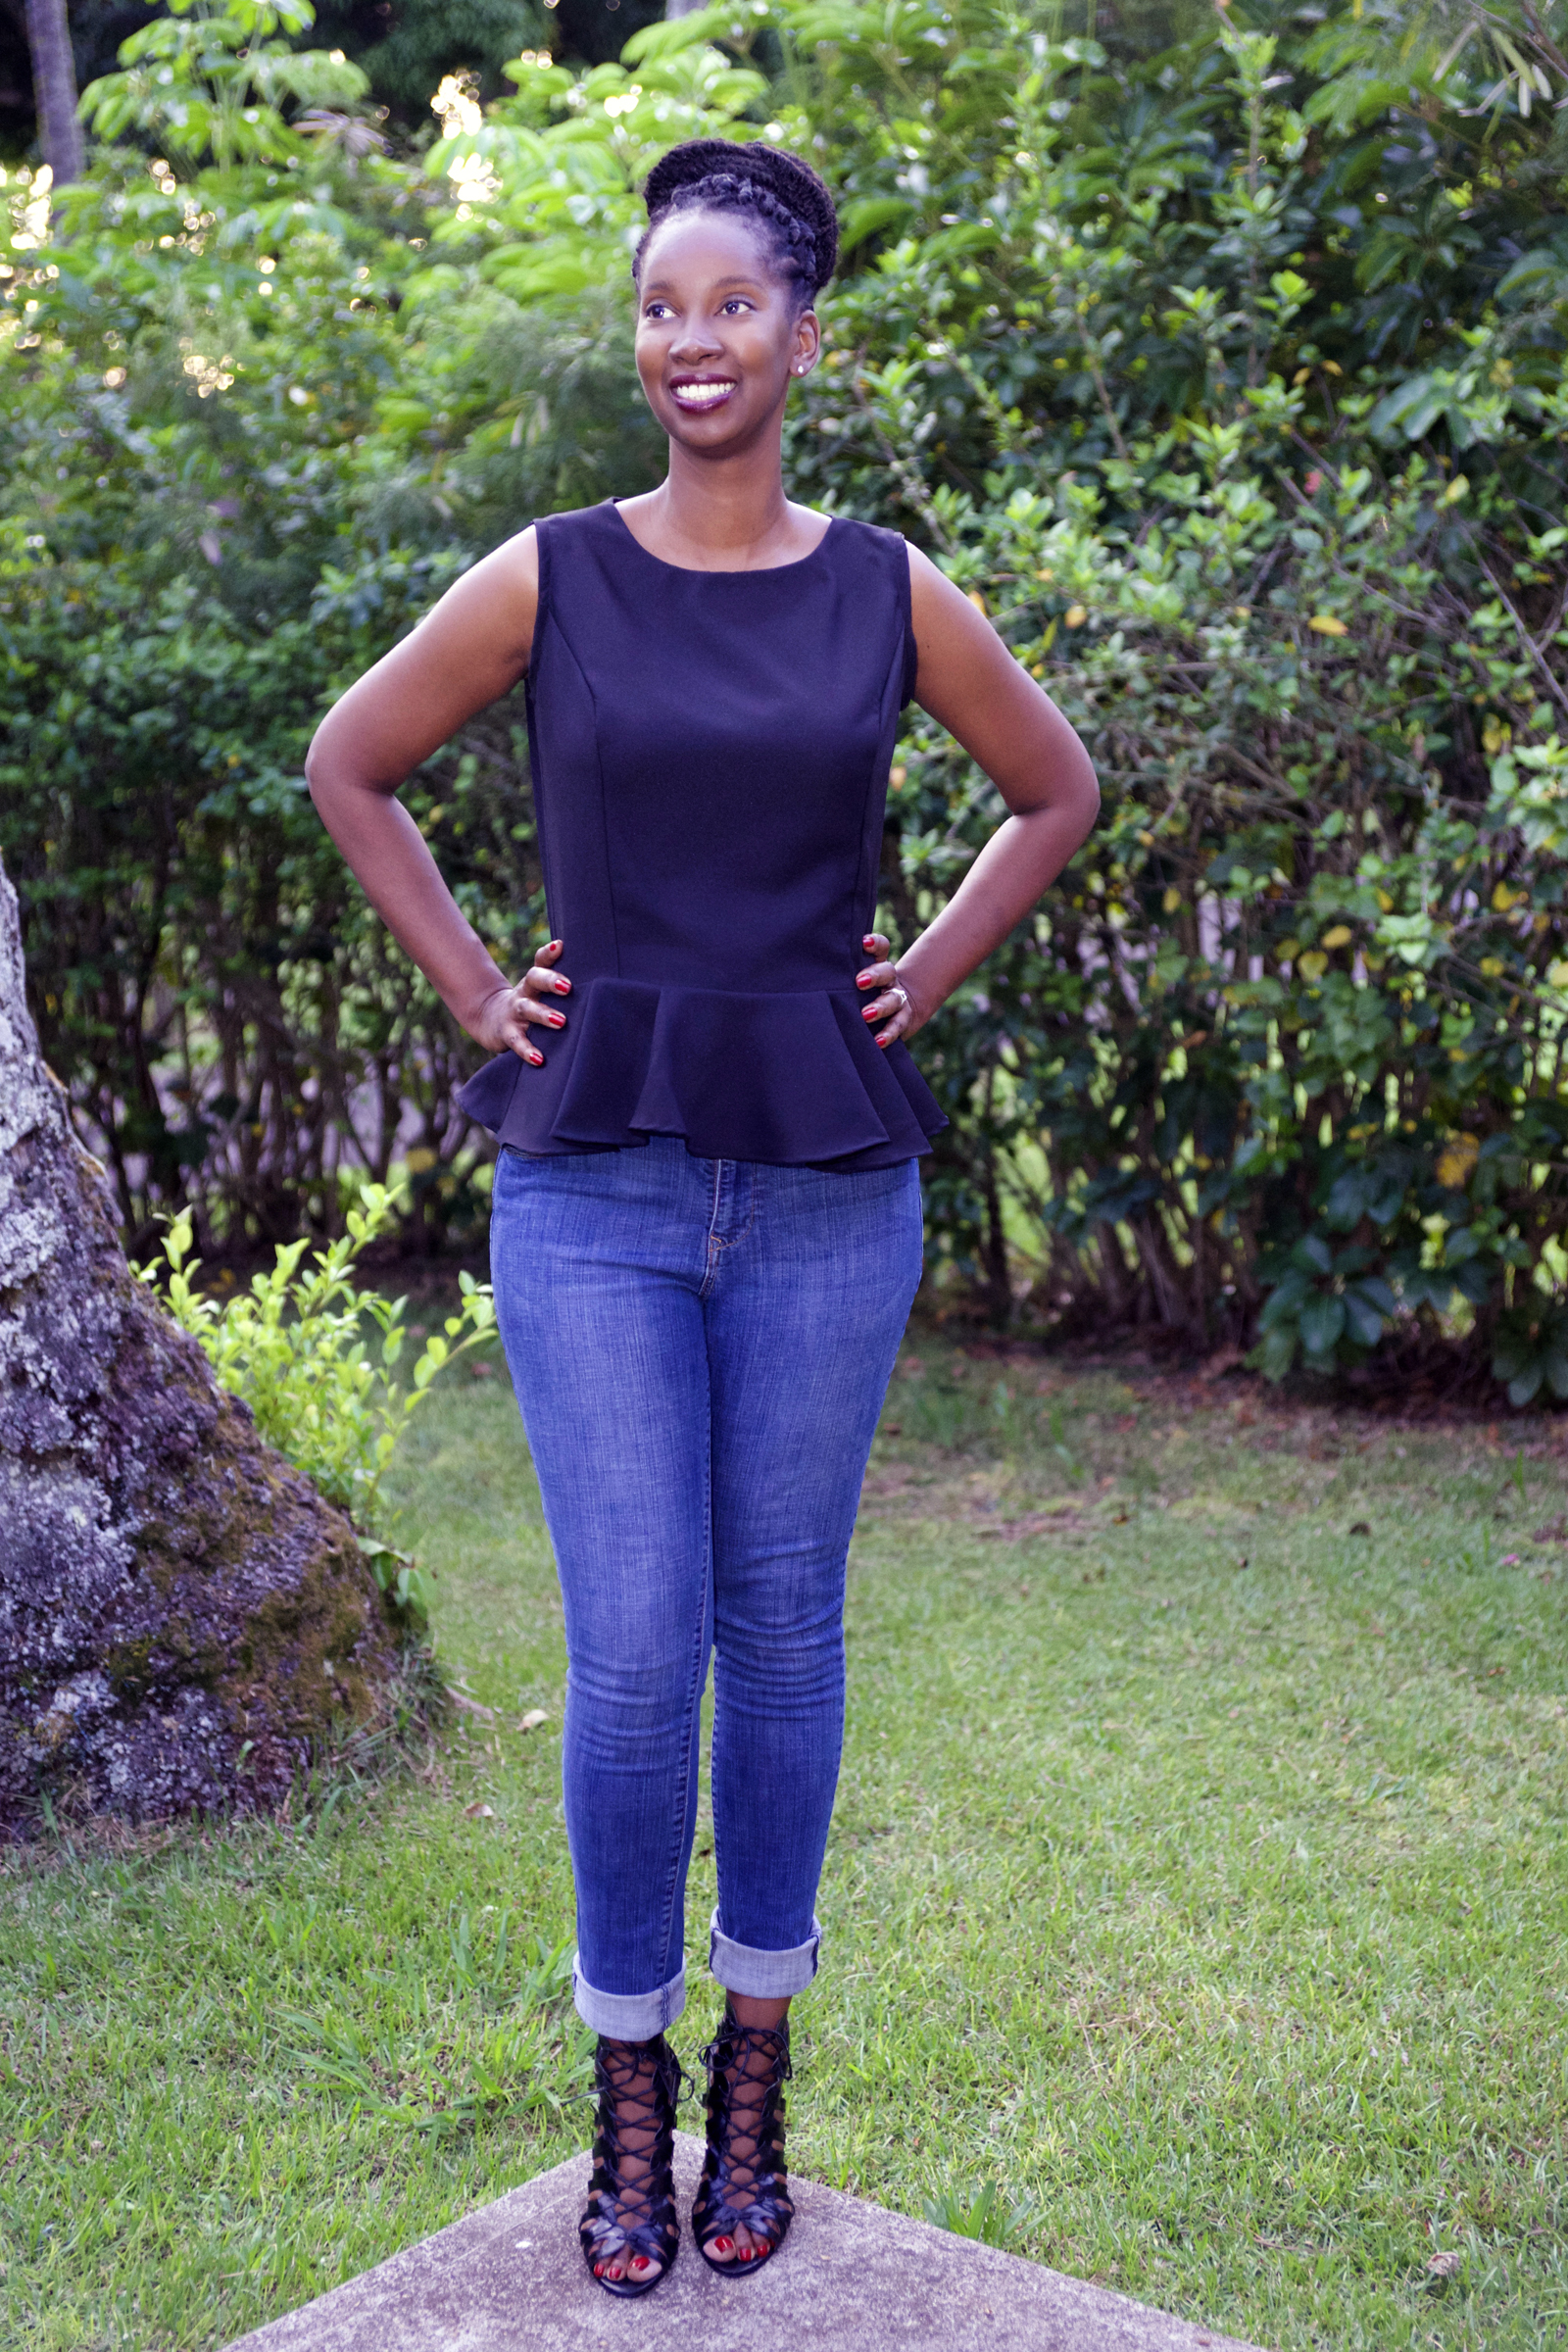
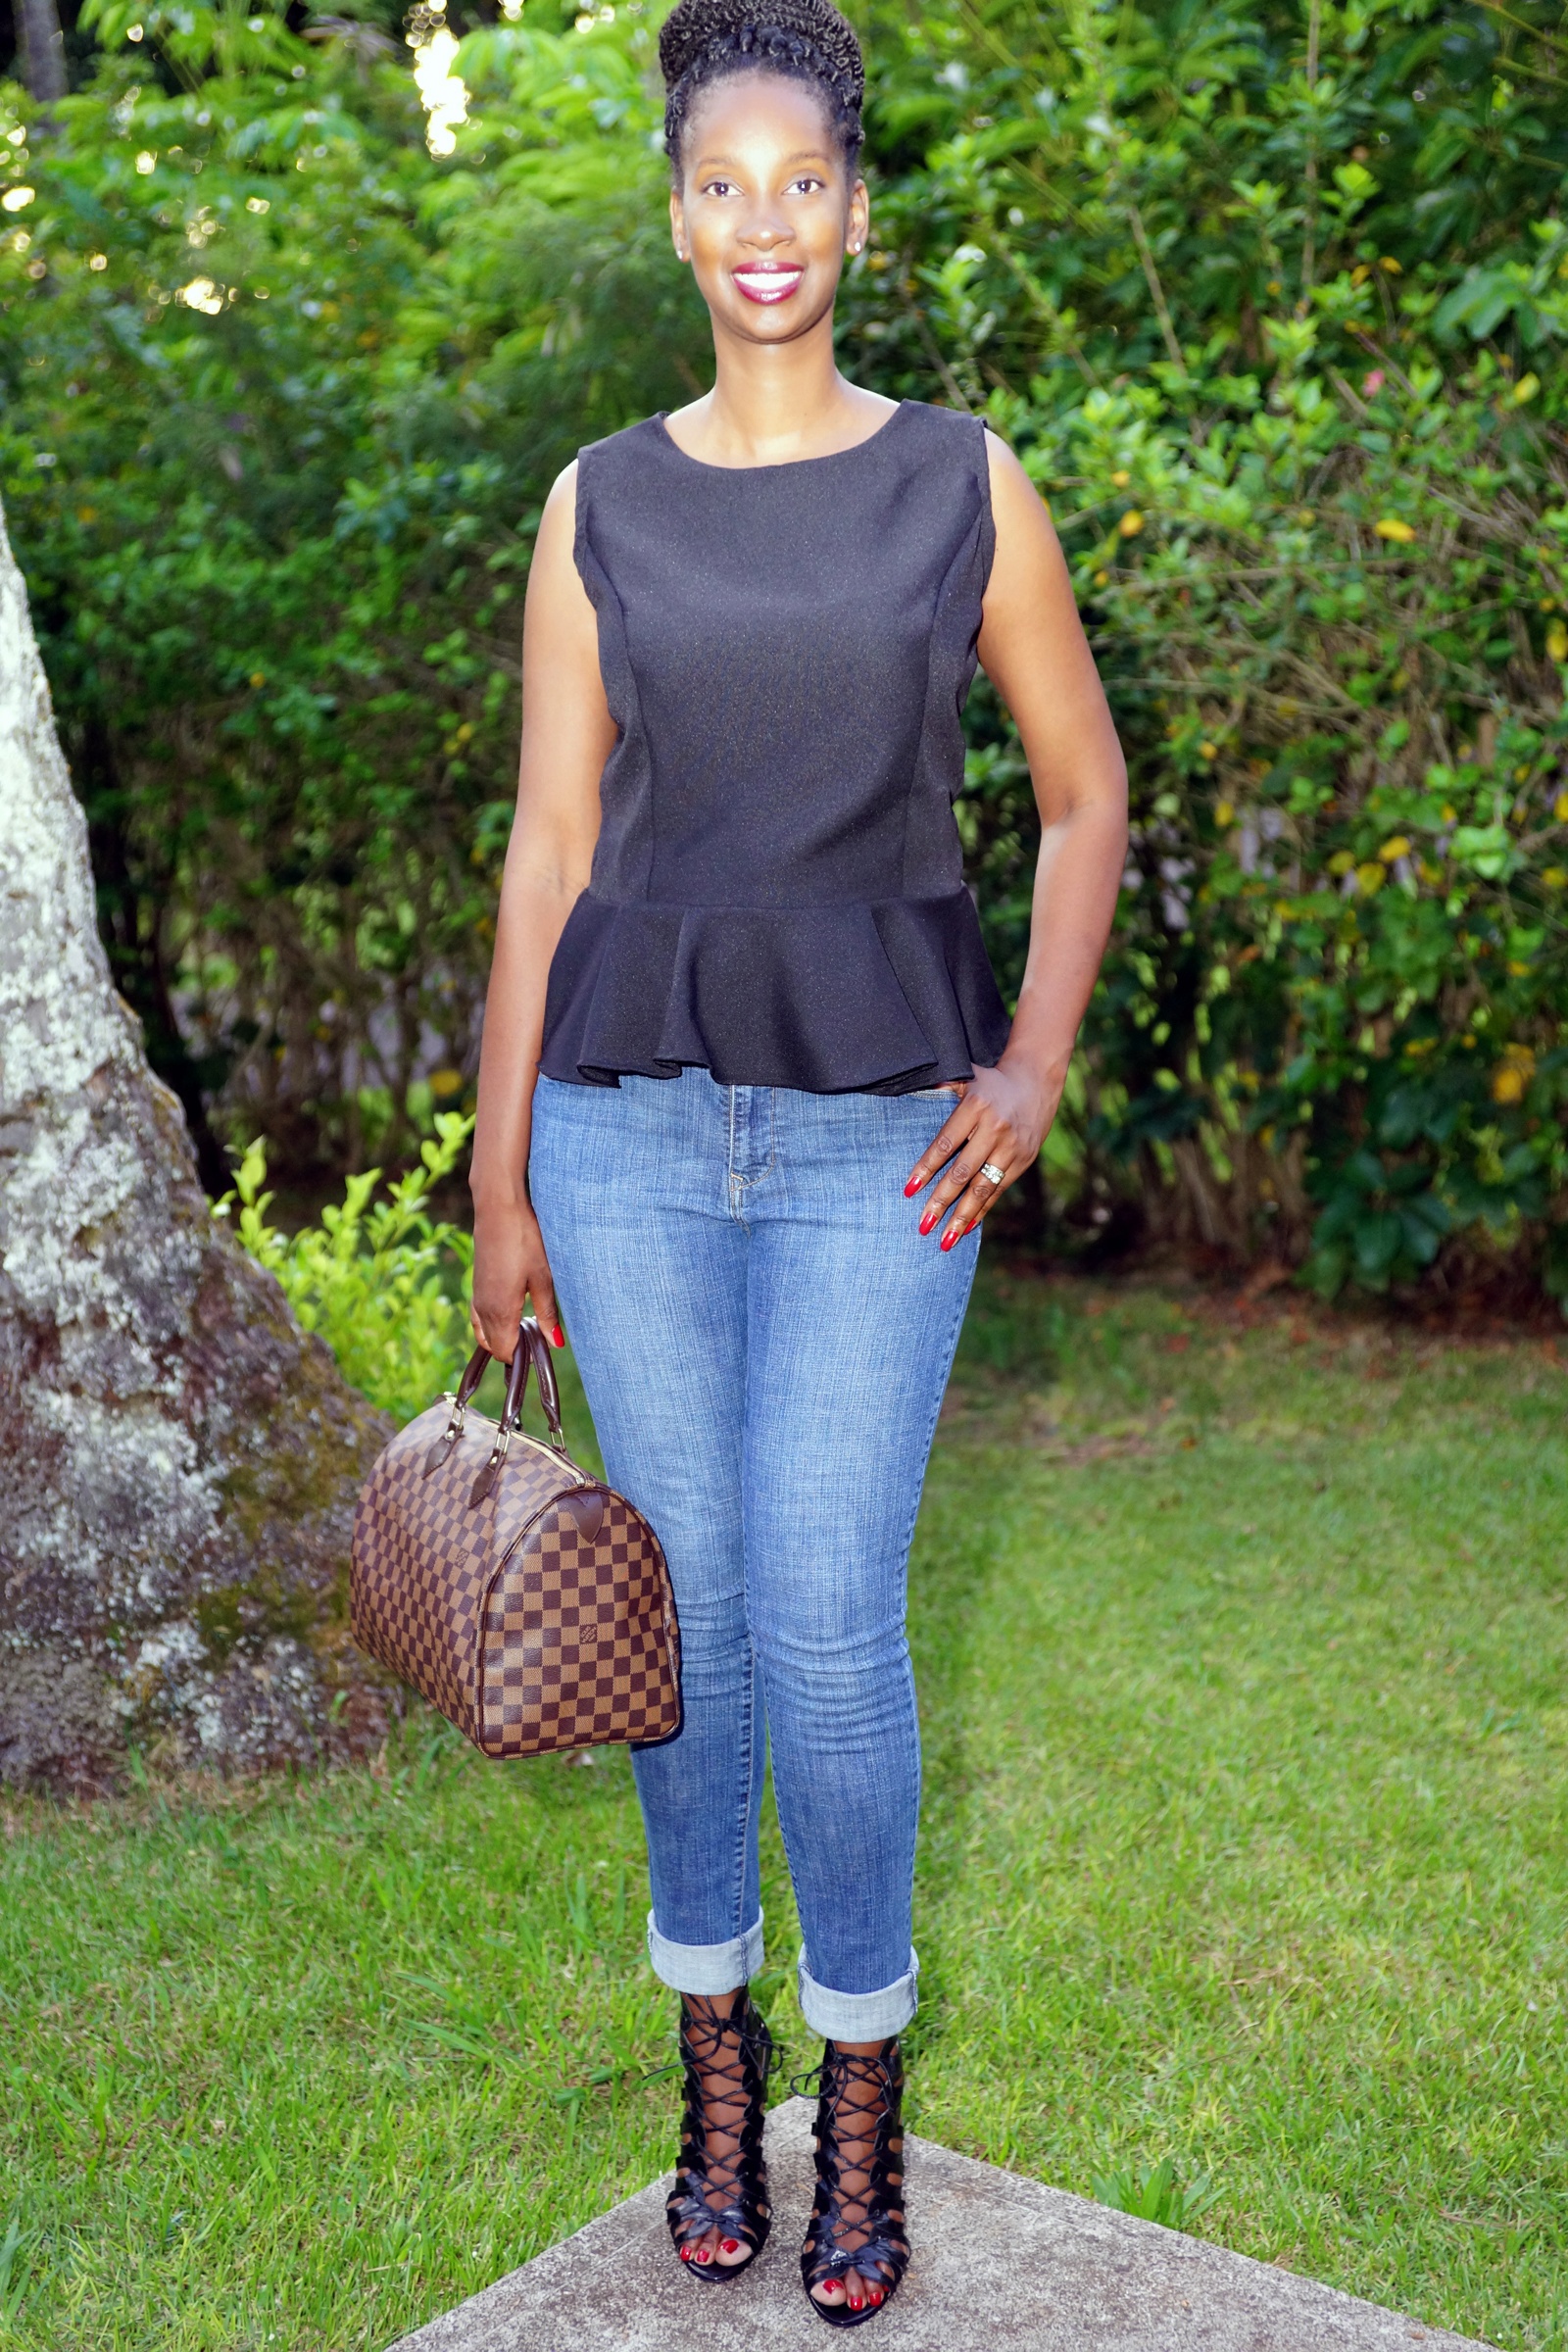
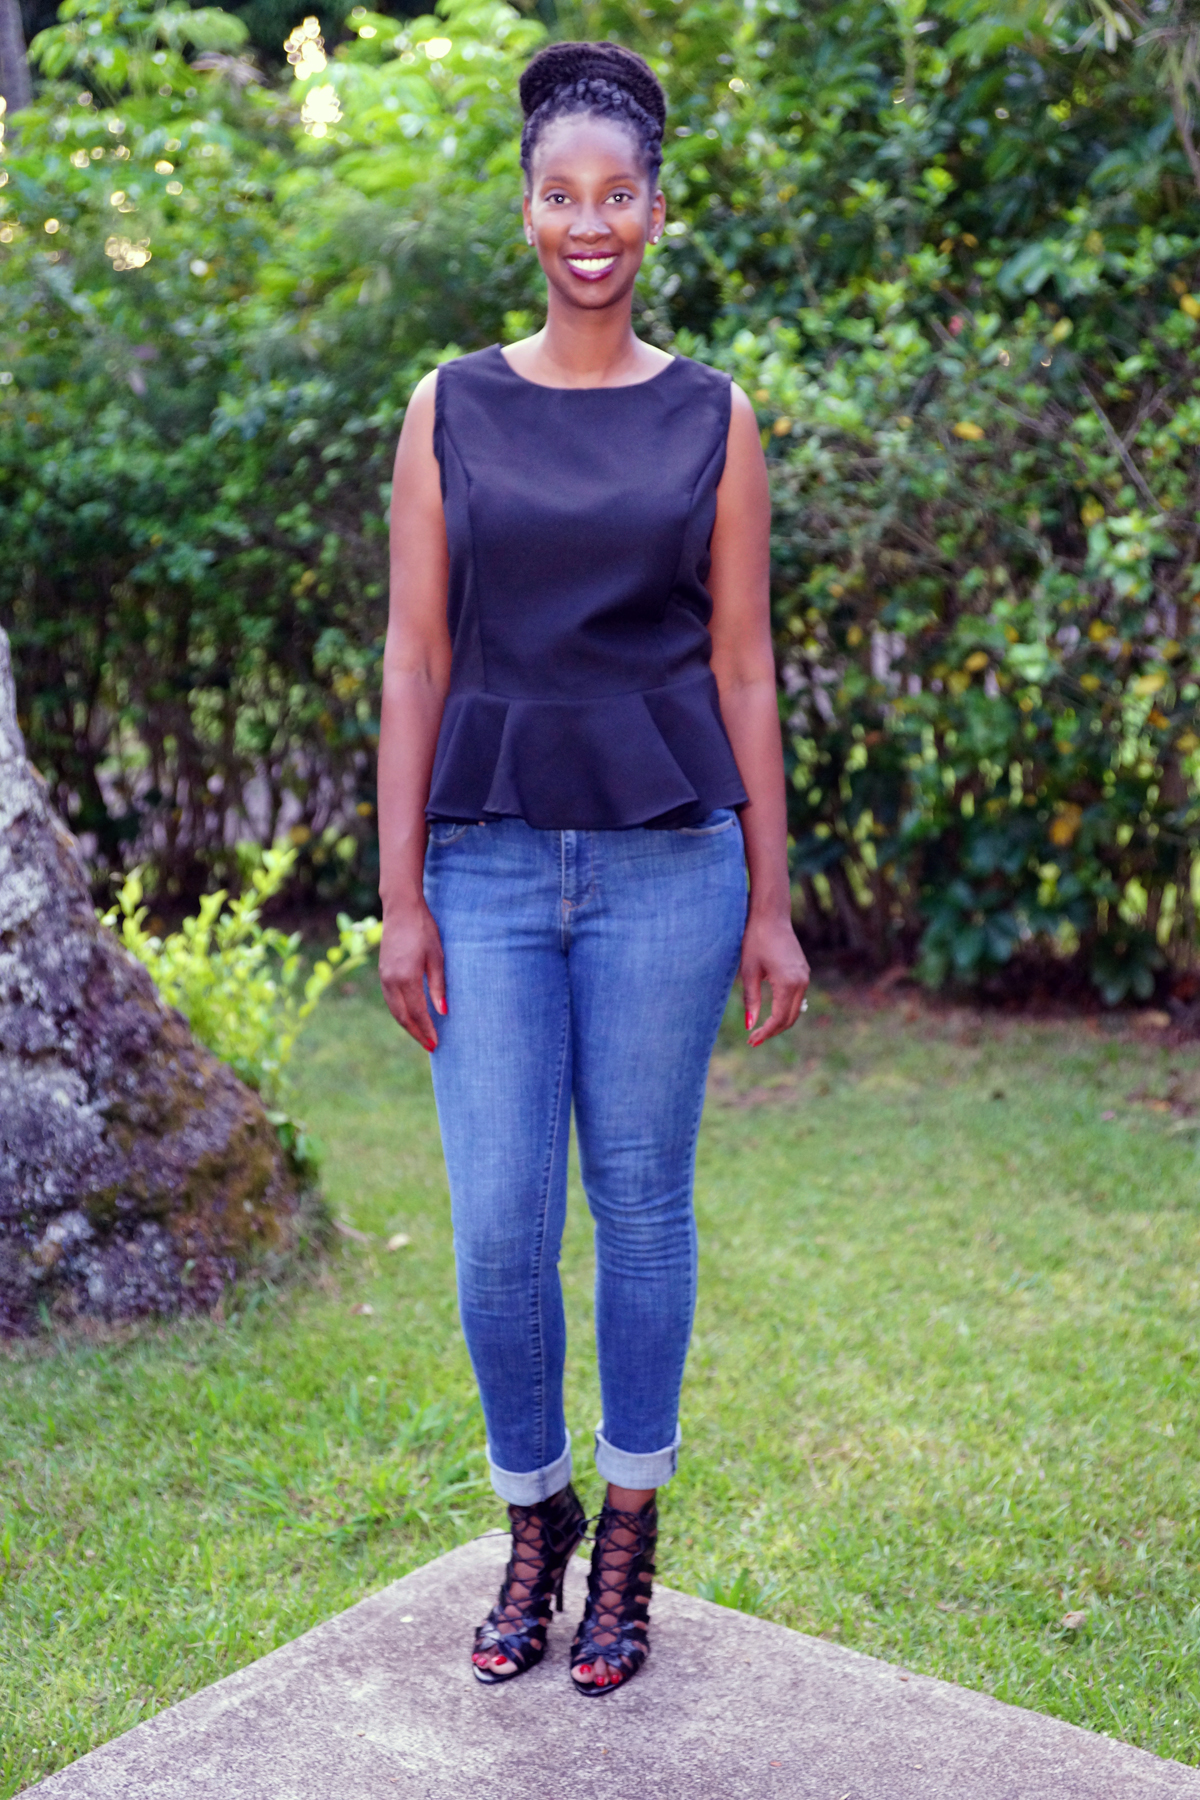
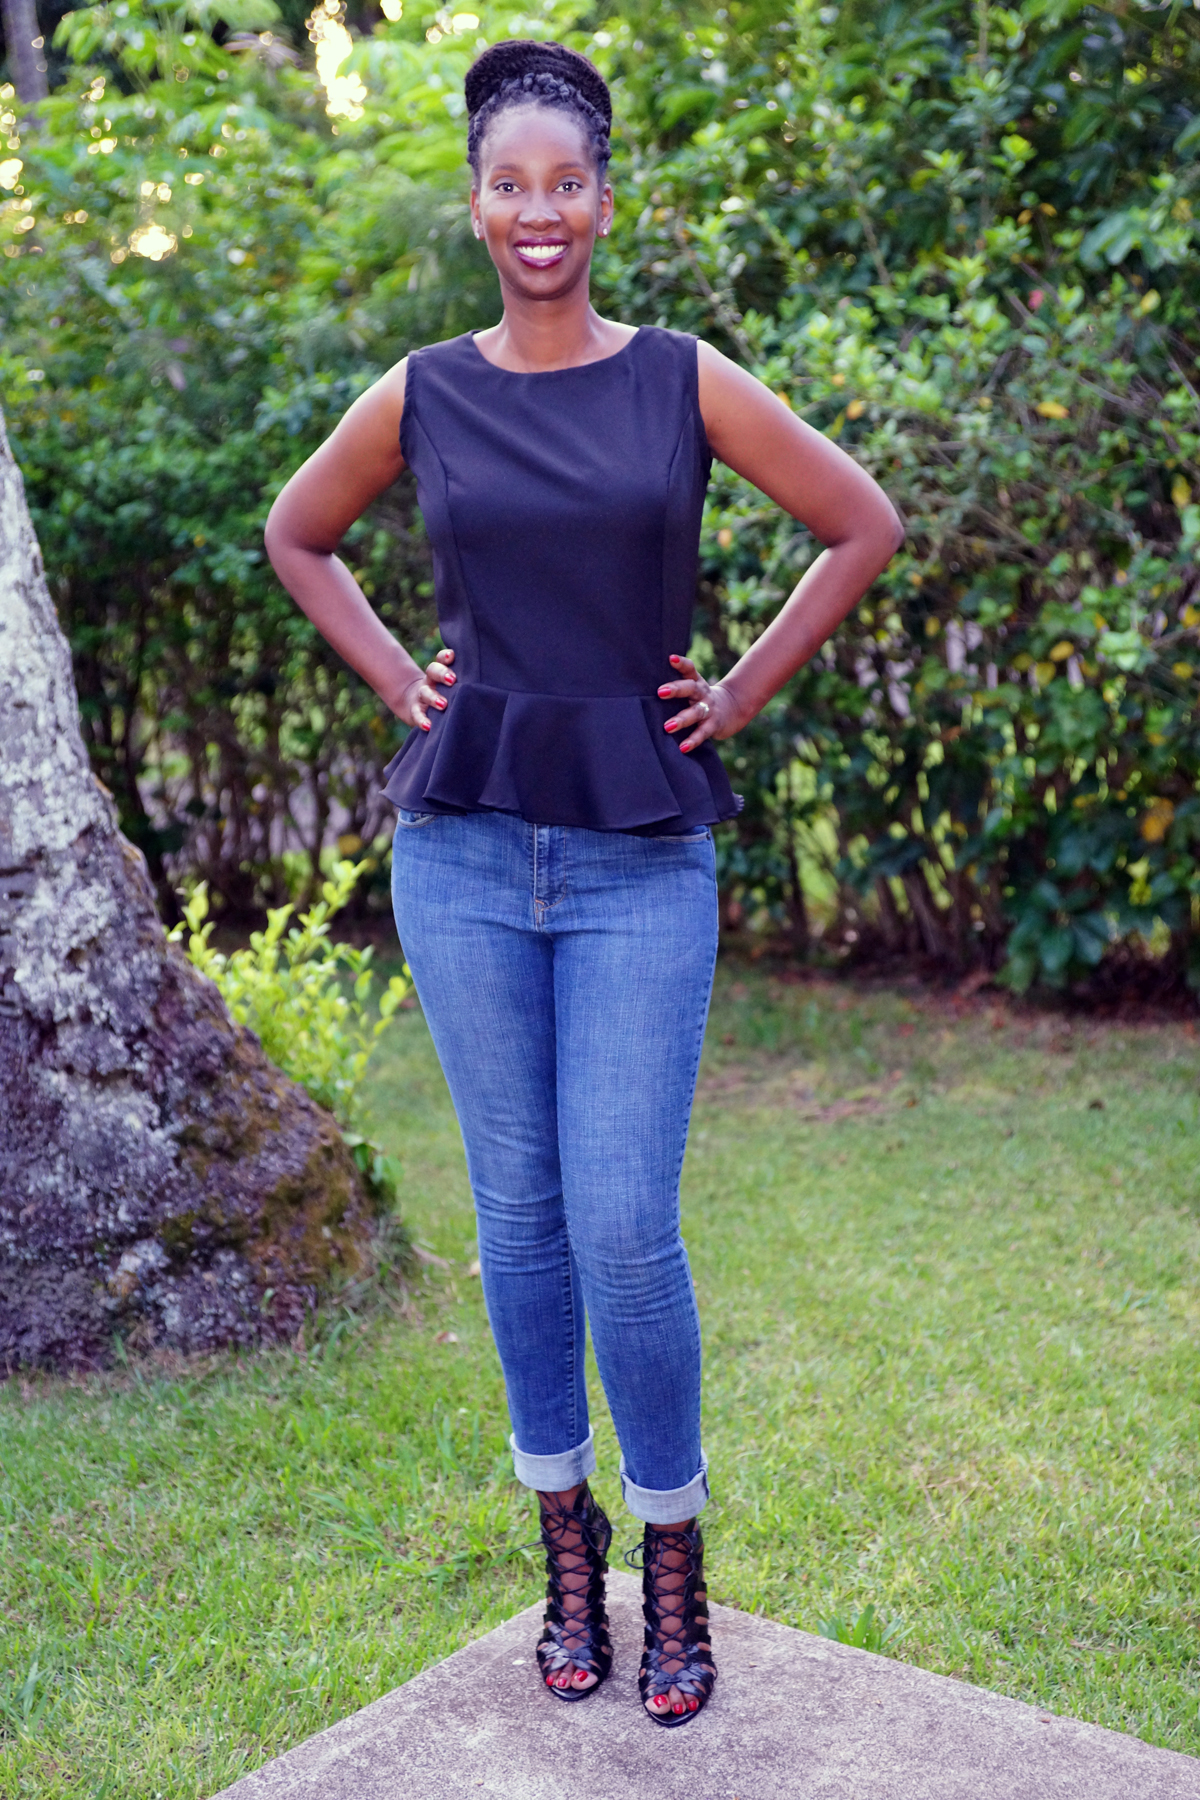
Category Archives: Pretty Tall Diy

DIY Burgundy Pants and Foulard Print Top

Pretty Tall Style Blog | DIY Burgundy Pants

Pretty Tall Style Blog | 3.1 Philip Lim x Target


Pretty Tall Style Blog | DIY Burgundy Pants


Pretty Tall Style Blog


Pretty Tall Style Blog | DIY Foulard Print Top


Pretty Tall Style Blog

 What I’m Wearing :

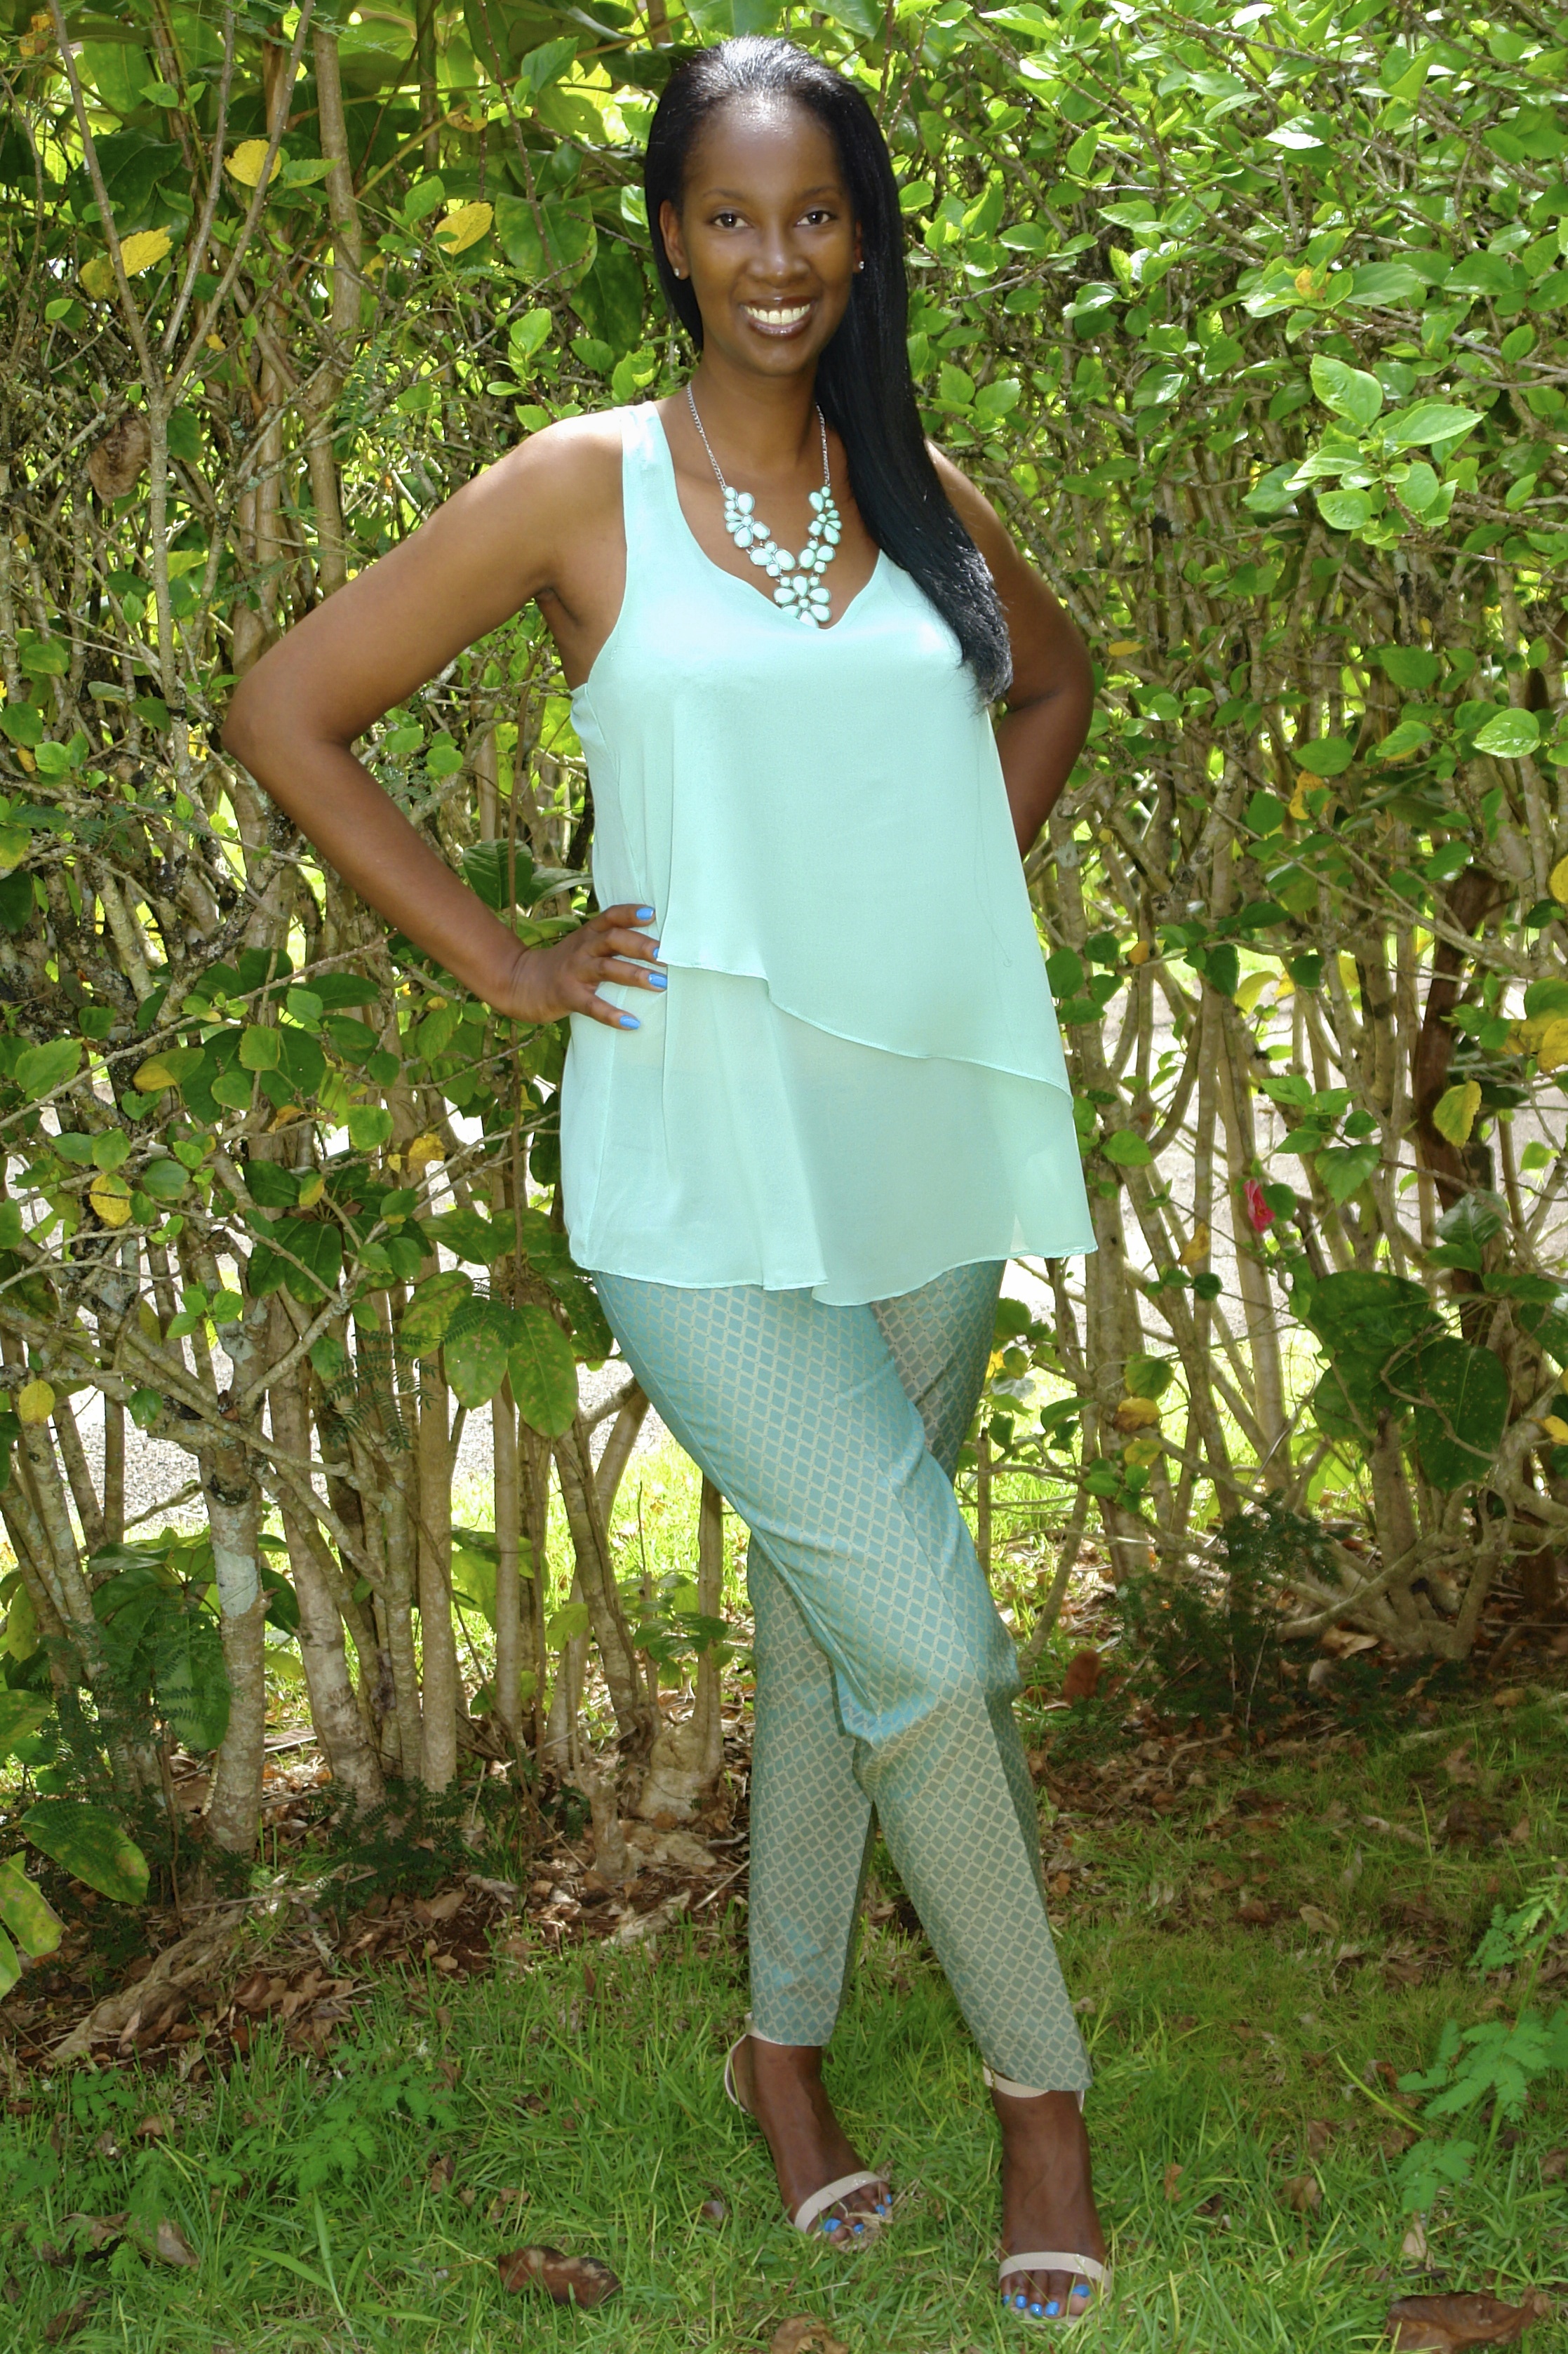
Bottom: DIY Pants using pattern New Look 6216

Top: DIY using pattern New Look 6216

 Shoes: Avenue.com

 Blazer: BananaRepublic.com (old), similar

 Necklace: Charlotte Russe

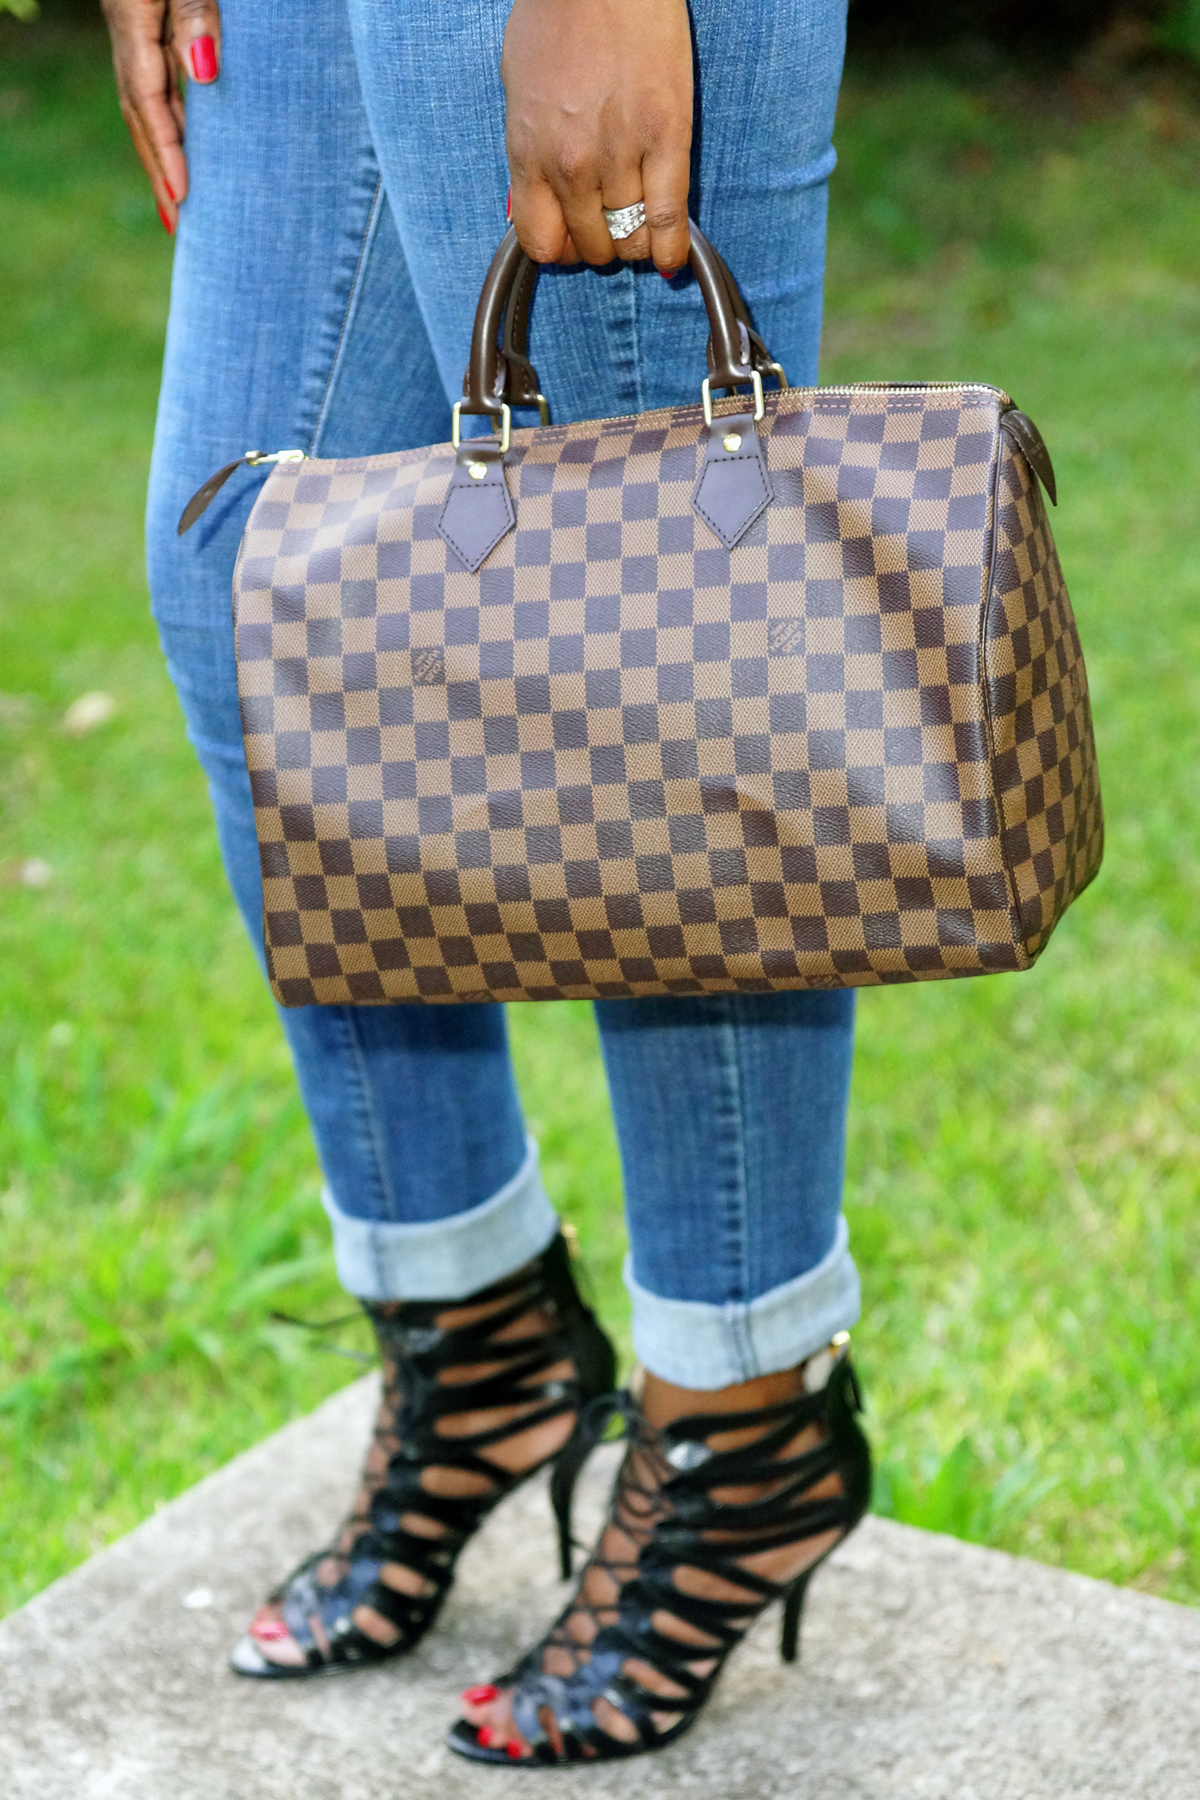
 Bag: 3.1 Philip Lim x Target

So I found a pattern that I am absolutely in love with.  I’ve made a top and three pair of pants from it already and plan on making a whole lot more.  They are both so easy to make and very fast to sew. Talk about comfortable to the tenth power as well.  These are the equivalent to throwing on a pair of sweats or yoga pants with a way more polished look.  Especially when you throw on a pair of heels and a blazer.  But these pants can easily be cuffed or rolled up and worn with a tee or sweatshirt and flats for a more casual as seen in a previous outfit post here.  I am loving sewing right now especially when I find the perfect fabric and pattern for my beginner skills.  I’m telling you my tall friends if you haven’t already bought yourself a machine, you need to get one, it will become your best friend. :)

Hugs,

signature


Black Maxi Skirt into Fall

Pretty Tall Style Blog - Maxi Skirt - Fall Style

DSC08730_pp

What I’m Wearing:

Maxi Skirt: AlloyApparel.com (old), similar available in extended length

Top: Nine West via Ross

Cardigan: c/o TallCouture.com (currently on clearance for $39.99, limited sizes left)

Shoes: Steve Madden (although you can’t see them, they are black leather ballet flats)

Clutch: DIY

Do you have some pieces in your wardrobe that you only wear during a certain time of year but wish you could wear year long?  Well maxi skirts are one of those items for me.  I used  to think of only wearing them during the summer months. Now with my addiction to Pinterest, I have found numerous ways to incorporate them into the fall/winter as well.  Speaking of “numerous ways”,  I have also found a number of ways to wear this cute 382 long sleeve cardigan in charcoal, from Tall Couture as well.  (I can’t wait to show you in upcoming posts). It is extremely comfortable and versatile, definitely a piece that is perfect for all seasons.

Thank you for reading!

Hugs,

signature

Primary Boom

Pretty Tall Style Blog - Primary Boom

Pretty Tall Style Blog - Primary Boom

Pretty Tall Style Blog  - Primary Boom

Pretty Tall Style Blog - Primary Boom

Pretty Tall Style Blog - Primary BoomprimaryboompaletteWhat I’m Wearing:

Bottoms : DIY using New Look 6216

Sweatshirt : 3.1 Philip Lim for Target

 Shoes : Nine West

 Bag: 3.1 Philip Lim for Target

Okay, okay I know what some of you may be thinking.  Yes I am looking quite colorful and bright today. I broke out the primary colors and I’m like “Boom” in your face…hehe. And I have to admit, that I kind of like it.  As you all know, I do not shy away from color, and have no problem wearing it head to toe.  Sometimes on a gloomy day, you need a little pick me up, and this outfit did it for me.  I mean how can one be depressed and down wearing a comic “Boom” sweatshirt and the boldest colors in the Crayola box. ;)

P.S. You can read my pattern review of the pants here.

Hugs,

signature

Neon Yellow and Gray

DSC08247_pp

DSC08248_2

I love the back of these shoes. All about the details!

DSC08236_pp

DSC08239_pp

DSC08235_pp

What I’m Wearing:

Bottoms: Banana Republic Factory Store (Tall size and DIY alteration) | Top: Old Navy | Shoes: Barefoot Tess 

 I hope you all had a wonderful weekend! I’ve had this neon yellow shirt for months and have never worn it because I couldn’t figure out what I wanted to wear it with besides jeans.  Then I remembered I had a pair of gray pants that would go well.  When I pulled out my pants they seemed a bit dated with the bootcut.  So I went over  to my sewing machine and turned them into skinnies.  It was pretty easy.  First I turned these gray pants inside out. Then  I took a pair of skinny pants I already owned and laid them on top.  I then took my tailors chalk and traced up until slightly above the knee where the outer and inner seams met on both pair.  I then pinned where my outline was and tried the pants on.  I liked the fit and didn’t need to make any adjustments.  I stitched them up with me machine and then trimmed off the excess.  Lo and behold I had a pair of brand new pair of gray skinny pants.

Thank you for reading!

signature

Hues of Blue : DIY Maxi Dress

Pretty Tall Style | Hues of Blue

Pretty Tall Style | Hues of Blue

Pretty Tall Style | Hues of Blues

Pretty Tall Style

Pretty Tall Style | Hues of Blues

Pretty Tall Style | Hues of Blues

Pretty Tall Style | Hues of Blues

Pretty Tall Style | Hues of Blues

What I’m Wearing:

Dress: DIY using pattern, NewLook 6210 | Blazer: Charlotte Russe | Shoes: Payless | Necklace: Wal-mart | Bag: Kate Spade

As you all know I love maxi dresses! But what you may not know is that blue is my favorite color.  All hues of blue, from the palest baby blue to the darkest navy blue and the brightest cobalt blue. So when I can combine a multiple shade of my favorite color, it makes me happy.  When one of those pieces is something that I made, it makes me this tall girl even happier.  :)

My Pattern Review:

Pattern Description: 
Misses dresses

Pattern Sizing:
10-22, I cut a size 14.

Did it look like the photo/drawing on the pattern envelope once you were done sewing with it?
Yes it did.

Were the instructions easy to follow?
The instructions were very to follow.

What did you particularly like or dislike about the pattern?
I liked that it was very easy to follow the instructions and super fast to sew.

Fabric Used:
The pattern states it is for knits only but I took my chances and used a polyester/cotton blend with a bit of stretch and it worked fine.

Pattern alterations or any design changes you made:
I added about 6 inches to the length of the pattern because I am tall and like for my maxi dresses to graze the floor. I omitted the split on the side and flared the skirt portion out on view A since I was not using a stretchy knit fabric and needed room to be able to walk in the dress.

Would you sew it again? Would you recommend it to others?
I would definitely sew this pattern again and recommend it to others who are beginners or someone who is looking for something fast and easy to sew.

Conclusion: 
Fast and easy pattern, perfect for beginners. I am very pleased with how my dress turned out.

Thank you for reading!

signature


DIY Peplum Top : New Look 6130 Pattern Review

Pretty Tall Style | Diy Peplum Top

DIY Peplum Top | Pretty Tall Style Blog

DIY Peplum Top | Pretty Tall Style Blog

Pretty Tall Style

DIY Peplum | Pretty Tall Style

Bottom : Old Navy | Top : DIY using New Look pattern 6130 | Shoes : Nine West via Nordstrom | Bag : Louis Vuitton | Nails : Finger Paints in Expressionist Red | Lips: Mac in Media

Hi lovelies! I hope you all are having a fabulous weekend so far. Today’s blog post has a couple of DIY’s  going on.  As you can see I have a new hair style.  I decided to give Havana Marley Twists a try.  I’ll have an upcoming post with more information about this do’ for those of you interested, sometime in the upcoming week.  The second DIY is my black peplum top.  I used New Look 6130 and here is my review.

Pattern Description: 
Sleeveless peplum top.

Pattern Sizing:
8-18, I cut a size 14. Since I’m a beginner sewer I’m not sure if the pattern runs big or if it was my error in not using the correct seam allowances,
because the top ended up coming out one size to big I think.

Did it look like the photo/drawing on the pattern envelope once you were done sewing with it?

I used the bodice from view C and the peplum from view B. So looking at these two I would say yes.

Were the instructions easy to follow?

Yes the instructions were very easy to follow.

What did you particularly like or dislike about the pattern?

I disliked the armhole facing and the method for attaching it. I’m wishing it was curved instead of straight because I had a hard time getting it aligned with the armhole opening. But I will chalk it up to being a beginner.

Fabric Used:
Black polyester crepe purchased from my local Fabric Mart.

Pattern alterations or any design changes you made:

I added 2″ to the bodice.

Would you sew it again? Would you recommend it to others?

I will definitely be sewing this pattern again. I will trying making it with sleeve and also with the asymmetrical peplum. I would recommend it to others.

Conclusion: 
Not my favorite peplum pattern so far because of the problems I had with the armholes and sizing, but it is still a good one.  I will attempt to take this top in some, before wearing it again.  Hopefully it turns out okay.

Thank you for reading, have a blessed Sunday!

signature

Blue and Purple Paisley DIY

Pretty Tall Style | Blue Purple Paisley Print

Read More →

Minty Fresh

DSC09186_pp

Read More →

Neon and Stripes : DIY Skater Skirt

neon blazer diy navy white stripe skater skirt

neon yellow blazer navy white stripe skirt diy

neon yellow blazer navy white stripe skater skirt

navy heels navy kate spade bag navy white stripe diy skirt neon yellow blazer

neon yellow blazer navy white stripe diy skirt

Skirt : DIY | Blazer : Charlotte Russe | Top : Old | Shoes : Payless (size 12) | Bag : Kate Spade

Another item that has been on my wish list for quite some time is a ‘skater skirt‘.  Now for the longest time I didn’t realize they were called skater skirts, and then I had no clue as to why they were called skater skirts.  But I’m a ‘googler’ so of course I had to google it.  I found that a skating or skater skirt is high waisted, short and flowy, with a hemline that hits above the knee. Check, check, check and check. I think I passed the test and even get extra credit points because mine has pockets. I’ve always thought they were cute when I’ve seen them on other people but didn’t really think that I could get away with wearing one because they would be too short on me and not appropriate for my “old” age.  But I figured if I made one I could make sure it was a good length for me, short but not too mini-skirtish. I chose a cotton navy and white stripe print fabric. This skirt will pair well with many different colors and options in my closet this spring and summer. I love the freshness the neon blazer gives it.

Thank you so much for reading.

signature

Green Goddess DIY Maxi Dress

ALT = "diy green maxi dress"

ALT = " off shoulder kelly green maxi dress"

ALT = " green off shoulder maxi dress"

ALT = "coral striped coach bag gold cuff bracelets green dress"

ALT = " green diy maxi dress"

ALT  = " wearing emerald green maxi dress"

 emerald green diy maxi dress

Dress : DIY  (using Vogue Pattern V8915 and my  modifications)| Sandals : Payless (size 12) | Bracelets : Forever 21 | Bag : Coach

When I was making this emerald green maxi dress I had no idea how it was going to turn out.  I knew in my head how I envisioned it looking, but let’s just say sometimes my visions don’t always come to life as planned.  But this time around it worked out.  I wanted a maxi dress that dropped off the shoulder and draped the body after seeing a similar one on Pinterest. After I finished sewing this dress and tried it on I immediately thought ‘green goddess’ and knew I would finally be able to wear my matching gold cuff bracelets I had purchased from Forever 21 months ago.  Throw in a pair of gold sandals and my new Coach tote  (that my hubby and 2 year old son picked out for me for Mother’s Day) and my look was complete. What I love about this dress is that it is casual and comfortable, because it is made out of a cotton knit t-shirt material, but with my gold bracelets and sandals it kicks it up a notch  to casual chic, which I love especially being a stay at home mom.

I used Vogue pattern V8915 as the base for this dress.  I only needed to make a couple of minor modifications for the look I wanted.  I widened the neckline for the off the shoulder look.  I lengthened the dress to a maxi length for my frame.  I eliminated the pockets because I didn’t want them to show through the material and mess with the way it draped on me.  I used scraps for my belt (not on purpose…) I ran out of material..lol…rookie mistake.  I need to stop only buying two yards of fabric unless I know specifically what I’m going to make.  This was a very easy dress to make and I will definitely be making more in different variations and colors.

Thank you for reading!

signature

Post Navigation